Are you looking to protect your wooden surfaces from water damage? Whether you’re working on outdoor furniture, decks, or indoor wooden items, waterproofing is essential for maintaining the beauty and integrity of wood. Here are three effective methods to waterproof wood, ensuring it stays in prime condition for years to come.
Table of Contents
Why Waterproof Wood?
Before we get into all the solutions to waterproof wood. Let’s understand more in detail about why we need to waterproof it in the first place.
1. Prevents Water Damage and Warping
Water is one of wood’s greatest enemies. When unprotected wood is exposed to moisture, it can absorb water like a sponge. This absorption causes the wood fibers to swell, leading to warping, twisting, and cupping. Over time, this can compromise the structure of wooden items.
Waterproofing creates a barrier that prevents water from penetrating the wood’s surface, maintaining its shape and stability.
2. Protects Against Rot and Decay
Constant exposure to moisture creates an ideal environment for fungi and bacteria that cause wood rot. These organisms break down the wood’s cellular structure, leading to decay that can ultimately destroy the wood. By waterproofing, you create an inhospitable environment for these destructive organisms, significantly extending the wood’s lifespan.
3. Maintains Aesthetic Appeal
Unprotected wood exposed to water can develop water stains, discoloration, and a weathered appearance. Waterproofing helps preserve the wood’s natural beauty, color, and grain pattern. Some waterproofing methods, like certain oils and stains, can even enhance the wood’s appearance by bringing out its natural tones and textures.
When to waterproof wood?

Timing is crucial for effective wood waterproofing. For new wood, wait until the moisture content is 12% or less, and allow 3-6 months for pressure-treated lumber. It’s best to avoid application in direct sunlight or extreme temperatures. The ideal conditions are temperatures between 55°F to 90°F and relative humidity below 85%.
How to Prepare Wood for Waterproofing
For any waterproofing method, you can prepare the wood the same way:
- Remove existing finishes: Sand down to bare wood using sandpaper or chemical strippers.
- Clean the surface: Use a pressure washer for large outdoor items or wipe down with a tack cloth or vacuum.
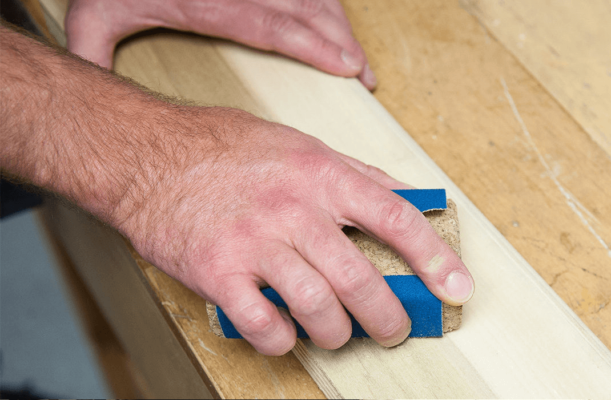
- Sand the wood: Start with coarse grits and move to finer grits for a smooth finish.
- Clean again: Remove all dust and residues with a vacuum or tack cloth.
Now that we know why we need to waterproof wood and all the entire preparation process, let’s get into the three most popular methods on how to apply it.
Methods to Waterproof Wood
Method 1: Waterproofing with Synthetic Sealants
Synthetic sealants create a protective barrier on the wood’s surface, preventing water from penetrating. They offer a range of sheens from satin to high-gloss and are ideal for both indoor and outdoor applications.
Types of Synthetic Sealants:
- Varnish: Varnish provides the wood a strong, shell-like surface that prevents fading and is ideal for outdoor usage since it blocks damaging UV radiation.
- Lacquer: Lacquer imparts a deep tone to the wood, but it will yellow over time.
- Polyurethane (water-based and oil-based): Polyurethane sealants, which are available in both water and oil-based forms, are popular wood finishes due to their ease of application and resistance to yellowing.
Step 1: Mix the Sealant
Stir gently with a paint stirring stick. Avoid shaking or vigorous stirring to prevent air bubbles which can lead to an uneven finish.
Step 2: Apply the Sealant

Choose a synthetic bristle brush or foam brush for application and brush the sealant onto the wood in thin, even layers, following the direction of the wood grain.
Ensure all surfaces, edges, and end grains are covered to provide complete protection.
Step 3: Let It Dry
After applying the first coat, allow the sealant to dry completely before applying additional coats. For water-based polyurethane, the typical drying time is two hours or more, while oil-based polyurethane requires at least four hours.
It’s crucial to keep the area well-ventilated but free from dust during this period to avoid contaminating the wet sealant.
Step 4: Sand Lightly (If Necessary)
If the wood surface feels rough after drying, lightly sand it with #220 to #320 grit sandpaper and clean the surface with a tack cloth to remove sanding dust.
Step 5: Apply Multiple Coats
Apply two or three more coats of sealant, ensuring that the sealant forms a visible, protective layer on the wood with no exposed grain.
Step 6: Clean Tools
Use warm water and soap for water-based sealants and mineral spirits or paint thinner for oil-based sealants.
Method 2: Waterproofing with Natural Oils
Natural oils penetrate deeply into the wood, providing protection from within and preserving the wood’s natural look and feel. Here’s how to use natural oils:
Step 1: Mix the Oil

Begin by pouring the oil into a separate container and stirring gently, allowing any bubbles to dissipate before application.
Step 2: Apply the First Coat
Using a brush, applicator pad, or lint-free cloth, apply the oil in the direction of the wood grain. Apply a thin, even coat to prevent pooling.
Step 3: Let the oil penetrate
Allow the oil to penetrate the wood for about 15 minutes. This helps the oil to deeply condition and protect the wood.
Step 4: Wipe the Surface Clean

Then, using a clean towel, wipe the entire surface gently in the direction of the grain to remove excess oil. This step is crucial to prevent a sticky finish and ensure even absorption.
Step 5: Reapply the Oil
If a second coat is needed, repeat the application process. Generally, one or two coats are sufficient. Too many coats can result in a cloudy finish.
Step 6: Clean Tools
Clean brushes and other tools with mineral spirits or paint thinner.
Method 3: Waterproofing with Stain/Sealer Combinations
Stain/sealer combinations provide both color and protection, making them ideal for outdoor wood projects.
Step 1: Mix and Box the Stain/Sealer
To begin, pour multiple containers of stain/sealer into a larger container, like a 5-gallon bucket, to ensure color consistency. Stir well to combine pigments and sealer evenly.
Step 2: Apply the Stain/Sealer

Using a 3/8-inch nap roller, nylon/polyester brush, pad applicator, or an airless sprayer, apply the stain/sealer in thin, even coats, working quickly to maintain a wet edge. Ensure even coverage on all surfaces and edges.
Step 3: Wait for the Stain/Sealer to Dry
Allow sufficient drying time between coats. Water-based stain/sealers typically require one to two hours, while oil-based stain/sealers need at least two to four hours. Ensure the wood is completely dry before applying additional coats.
Step 4: Apply a Second Coat
Apply a second thin coat, ensuring full coverage. Two coats are usually sufficient for protection and color.
Allow the final coat to dry thoroughly, typically two to three days before use.
Step 5: Clean Tools
Clean brushes, paint sprayers, and other tools with mineral spirits or paint thinner for oil-based stain/sealers. Water-based products clean up with water and mild soap.
Read more: Top 5 Types of Underwater Wood
Read more: Top 6 Best Timber for Outdoor Use
Above are the three most common methods to waterproof wood, we hope you can practice and find it easy to waterproof your wood after reading this blog. Whether you choose synthetic sealants, natural oils, or stain/sealer combinations, each method offers unique benefits. Consider your specific needs, the type of wood, and the item’s intended use when selecting the best waterproofing method. With proper application and maintenance, you can ensure your wood remains beautiful and protected for years to come.
If you’re interested in wanting to have African wood for your next project, you can contact K-Timber right away! Now we have EUDR certified for Iroko – a popular species that are great for both indoor/outdoor projects, we are confidence to satisfy and meet all our customers’ demand. Contact us now for free consultation!